Jig Set-up
For those who purchased this jig, here are a few hints to help you set it up quickly & accurately. I designed this jig to be used with point blanks from 7/16” square to 7/8” square. It will work with any length, too. To reiterate: the idea is to cut across the diagonal of the square at a slight skew. This gives you an advantage in two ways: first, it allows you to maintain the maximum width on the large end of the point blank while still leaving something solid to support the small end of your veneers during glue-up. And second, by giving you a tapered blank, it makes subsequent machining of the glued up forearm little easier.
NOTE: The fence on my bandsaw is on the right side of the blade and I used to cut the clearance on the jig before I shipped it. However, I soon found out that many bandsaws have the fence on the left side. Huh. Imagine that! Because I am unable to cut clearance for that style, I now ship the jig without any clearance cut on it at all. Instead, I will show you how to saw your own clearance at the end of this little tutorial.
First, tilt your bandsaw table to 45 degrees.
Next, adjust your fence to the optimum distance from your blade. This depends on both the length of your blank and the size of the square. Let’s first think about what we’re trying to do here. The saw blade will begin cutting on one side of the diagonal at the start of the cut, then pass thru the center of the diagonal at some point, crossing over to finish the cut on the other side of the diagonal. Ideally, you will have 2 identical pieces after you finish your cut. To achieve this, your blade must cross the centerline of the diagonal of the point blank at the middle of the blank’s length. Confusing to say but easy to do!
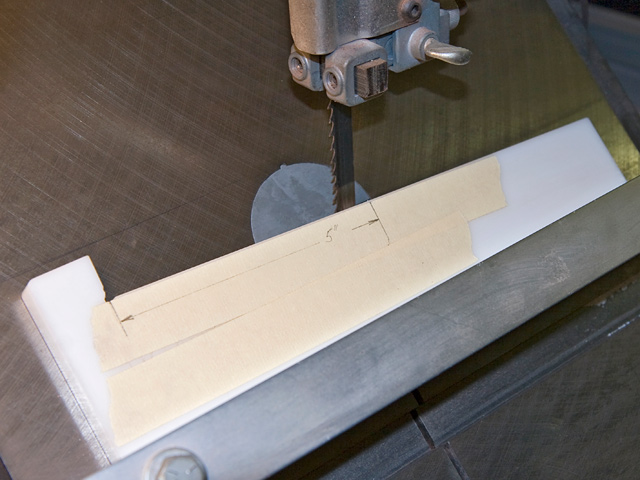
Measure the length of your blank. Let’s say it’s 10” long. Make a pencil mark half that length away from the stop on the jig – in this case, 5”. (Ignore the masking tape. It just makes the markings easier to see.)
Position one end of your square at the mark 5” away from the stop.
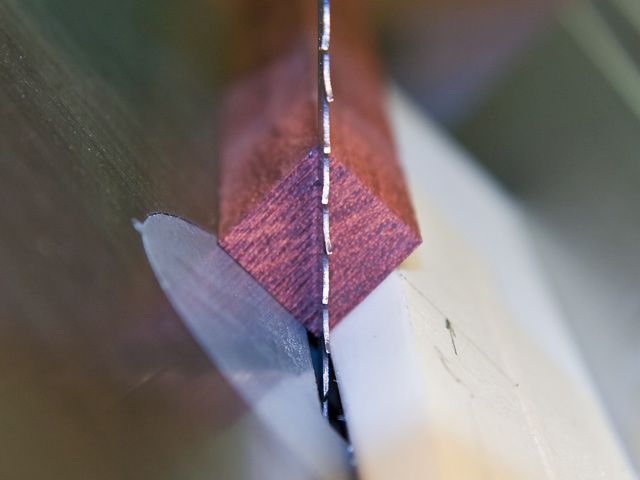
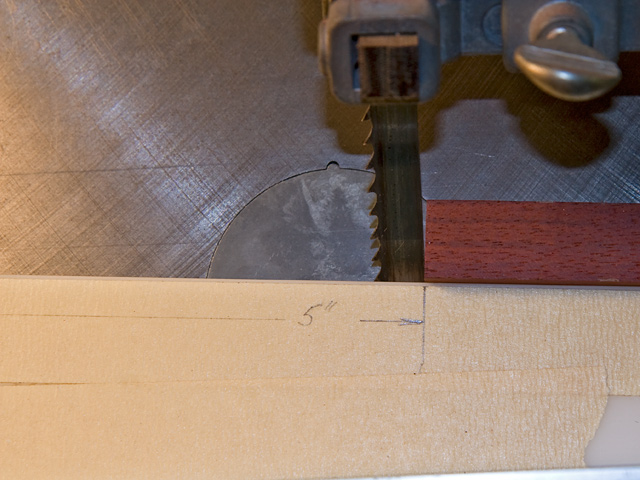
With the blank in the 5" position, adjust your fence so the saw blade lines up exactly with the middle of the blank. On the left is a view from the front & on the right is a view from the back. Note how the blade bisects the blank. Lock your fence in position & let 'er rip.

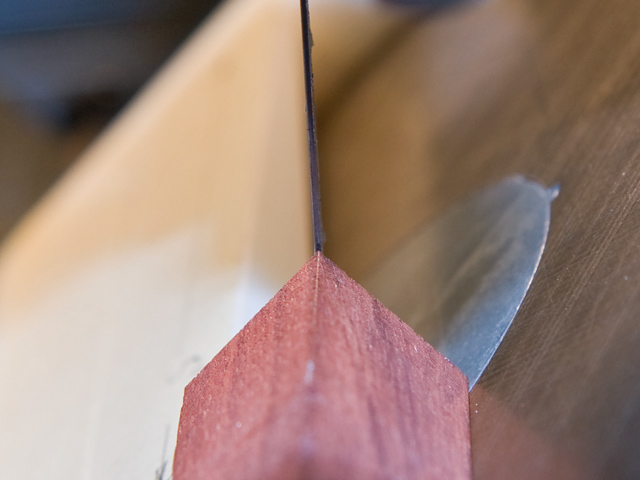
This is what you'll see when you finish the cut. If you've set it up correctly, both sections will be identical. Just be sure to stop feeding the blank into the blade as soon as you break through. The jig won't hurt your saw blade but you don't want to cut off the stop.
Fence on the left?
If your saw's fence is on the left side of your band saw blade, you can cut your own clearance. My pictures show me doing it on a saw with the blade on the right since that's all I have. You will get the idea, though, and all you have to do is the same thing...only in a mirror image. Trust me, it isn't be a big deal.
In a nutshell, what you will be doing is making a mark about 5" from the point blank stop on the jig. Tilt your table to a 45 degree angle. Bring the fence close enough to the blade so your saw will begin cutting into the jig at your mark. Slowly feed the jig into the saw blade, cutting the necessary clearance. Stop feeding when you get close to the point blank stop. Turn off your saw. Carefully back out the jig. If you look at it from the bottom, you'll see your saw cut approaching the undercut at the corner of your jig. Simply bend the sliver & break it off. With a utility knife, trim the broken edge & burr the saw cuts. That's it. Your jig is ready to use. See the pics below to better understand the steps.
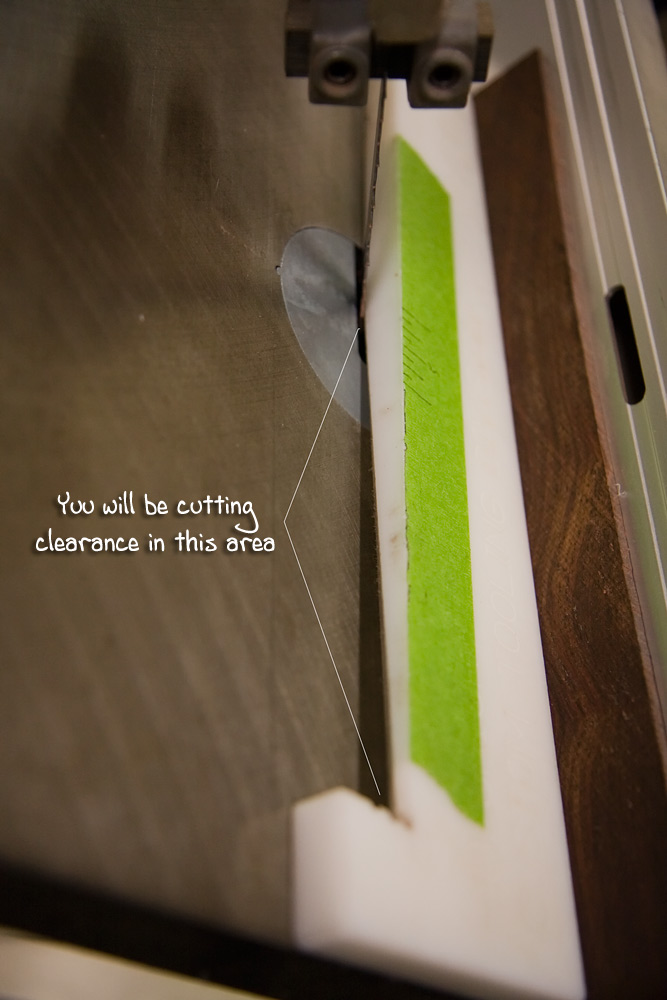
Here you can see my old jig - with clearance already cut into it - showing where the clearance starts. There are markings on the green tape that I use when actually using the jig and you can see that my clearance begins about 5 1/4" from the stop.
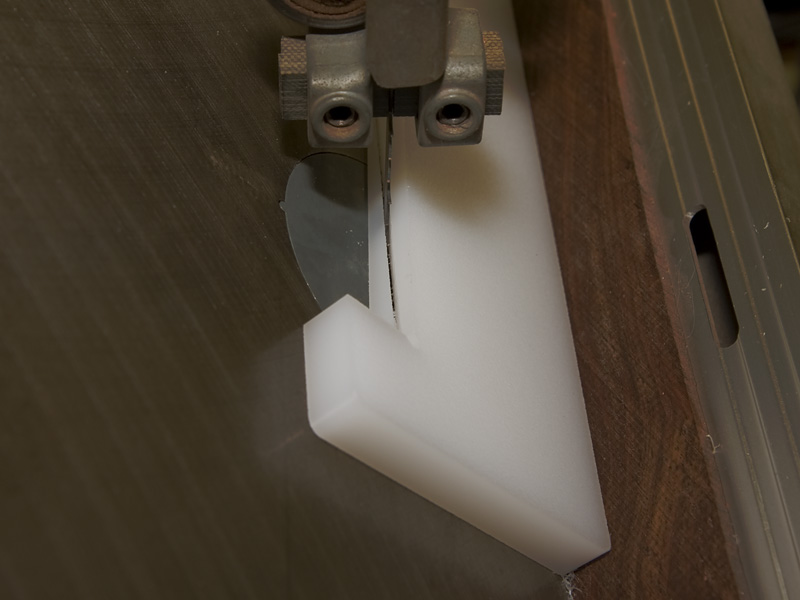
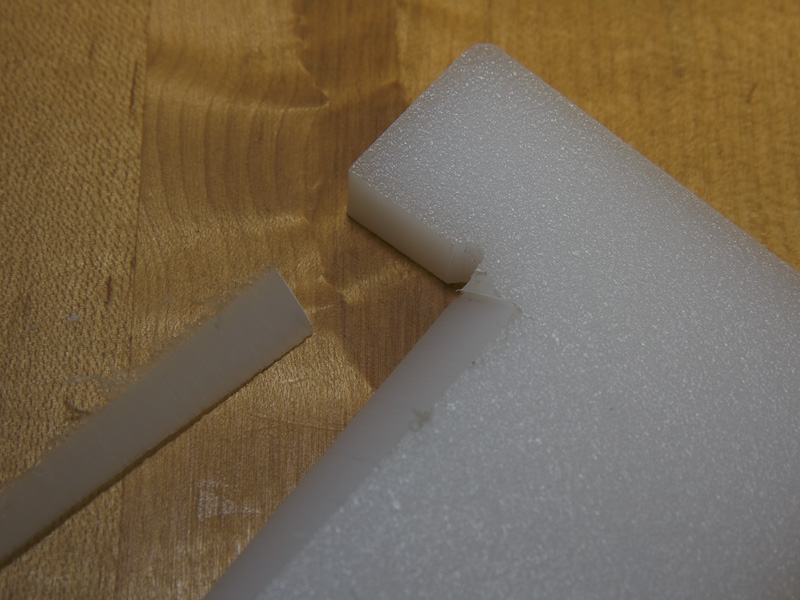
This shows a new jig with the clearance already cut. The thin sliver on the left will be removed.
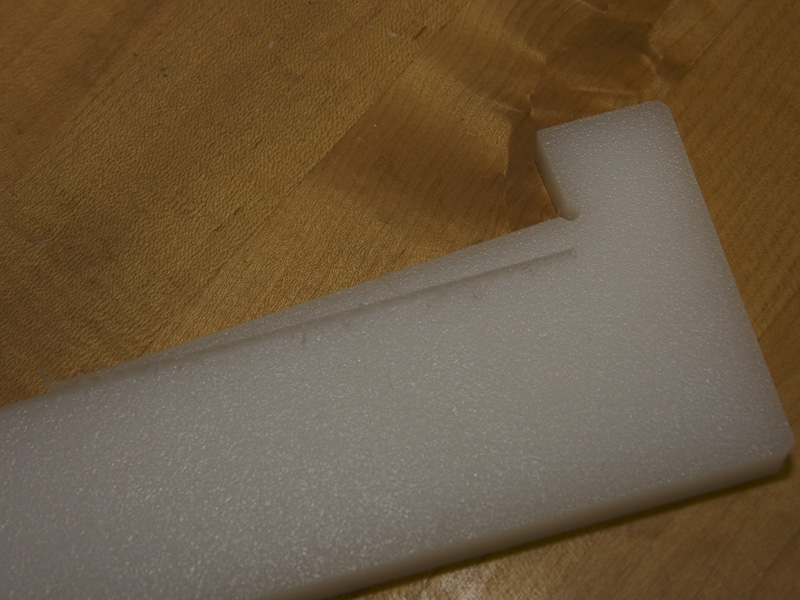
This view of the bottom shows the sliver still attached & ready to be removed.
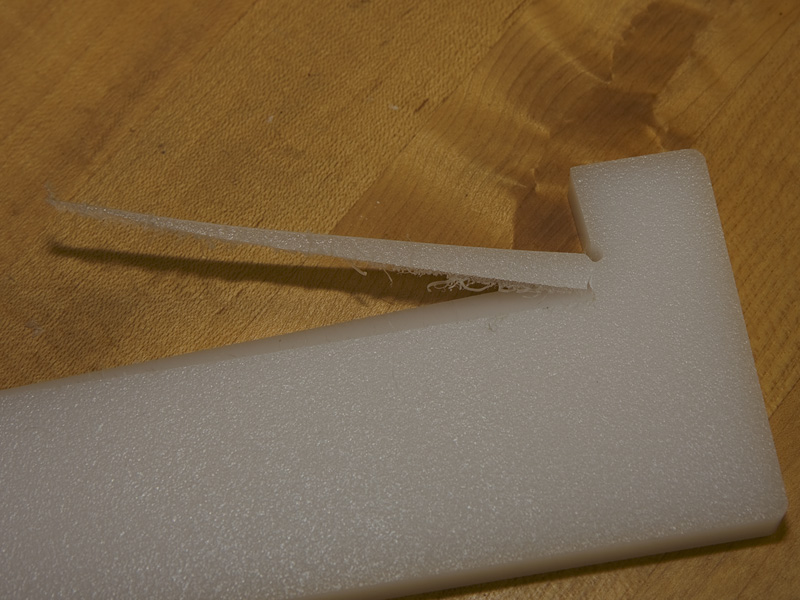
You can see how easily the sliver will bend away & break off at the end of the cut.
Sliver removed & jig ready to burr & use.
I hope this makes the clearance cutting operation clear.
The next page shows a jig I made for opening up trim rings.