Components from Cueballs
Making a Threaded Joint Collar From an Old Cueball
I like SS joints but a nice, white joint is the next best thing. It's hard to beat the beauty of ivory but some prefer environmentally friendly materials. Most of the alternatives are sold only as tubing, allowing the builder to simply slide on the tubing with a little glue. And it works. There's nothing wrong with that method.
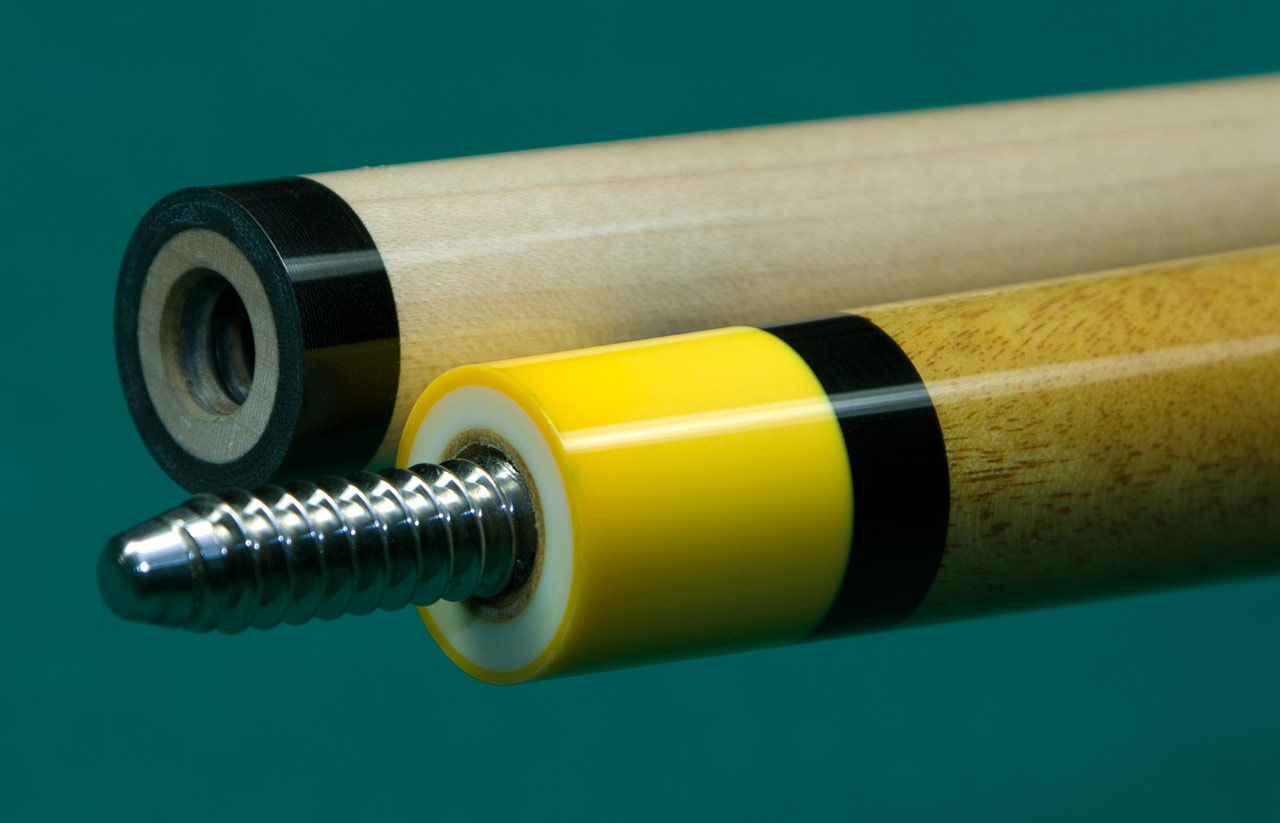
But I like a mechanical bond that reinforces the glue bond. It's very satisfying to tighten a collar and its trim rings, generously slathered in glue, up against a shoulder. The excess glue is squeezed out & there is a sense of finality when the collar is drawn up to a positive stop. You just KNOW it won't loosen.
Unfortunately, there aren't many white alternatives that come in solid rod form & avail themselves to being threaded. We won't even consider the thermoplastics as they are just too soft. Elforyn & Juma are two easy-to-machine materials that I have used successfully as joint collars. But sometimes I prefer something just a little harder.
I often make ferrules & joints from old cueballs. They are strong & take a beautiful polish. However, it takes a lot of work to get the most out of a cueball. I am able to get 7 ferrules or 3 joint collars out of one cueball. One thing I should mention: while these are a beautiful ivory color when first made, they will yellow over time - just like a cueball. So far, nobody has ever complained and I have many out there that are over 10 yrs old.
There are several ways to make the joint collars from a cueball. Below, I will show the "manual" method that anybody can do with basic shop equipment and HERE, I'll show an advanced method using CNC to speed up the job. Yet a 3rd method is shown HERE.
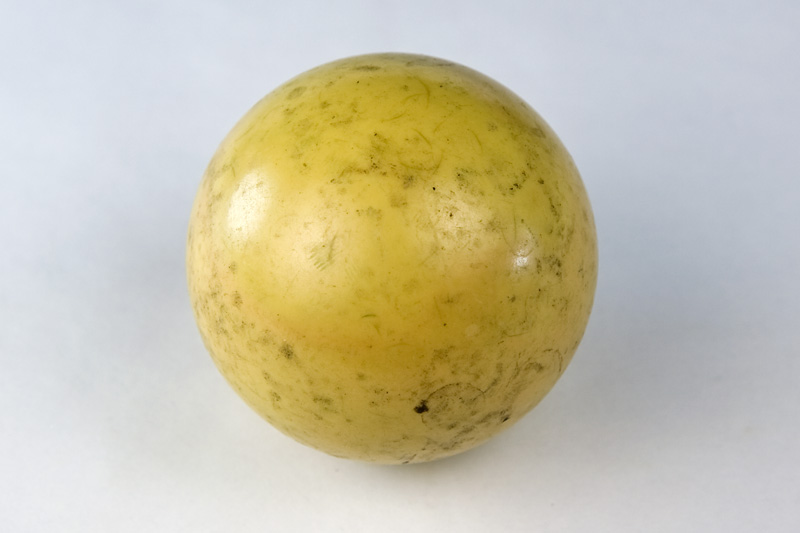
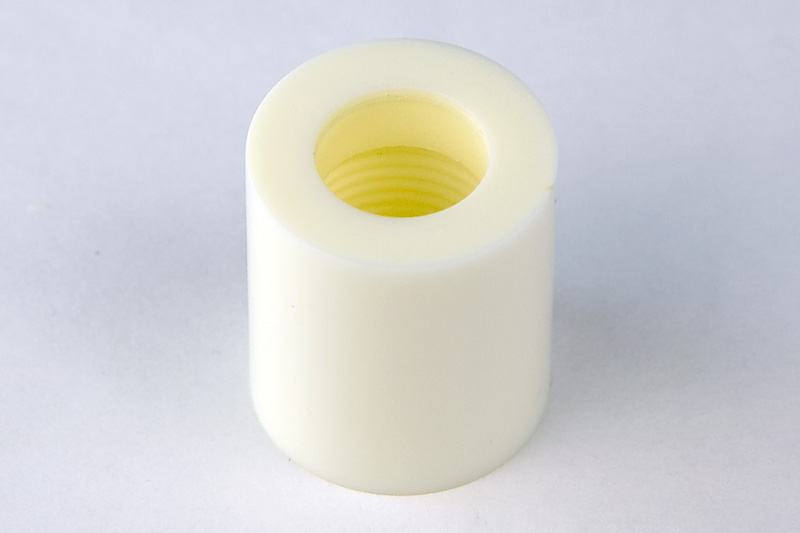
OK, this is your basic old cueball. This ball is (or used to be) 2 3/8" diameter. It is now .030 to .045 undersize, depending on where you check it.
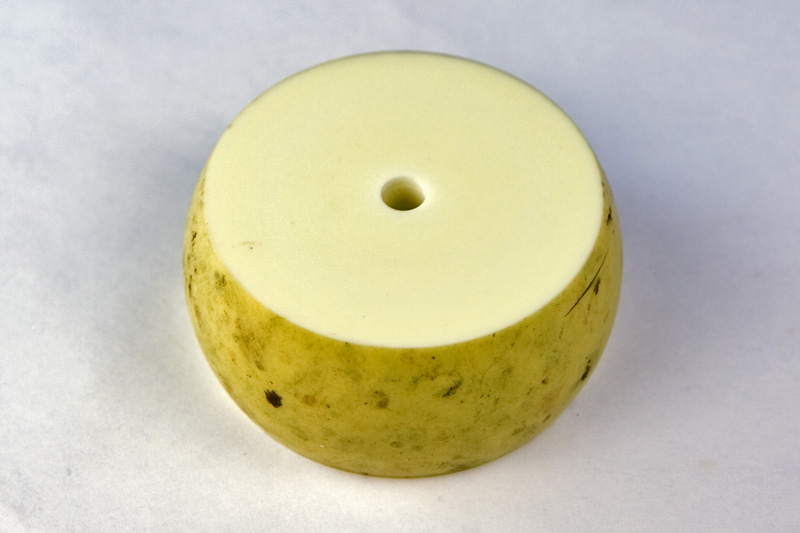
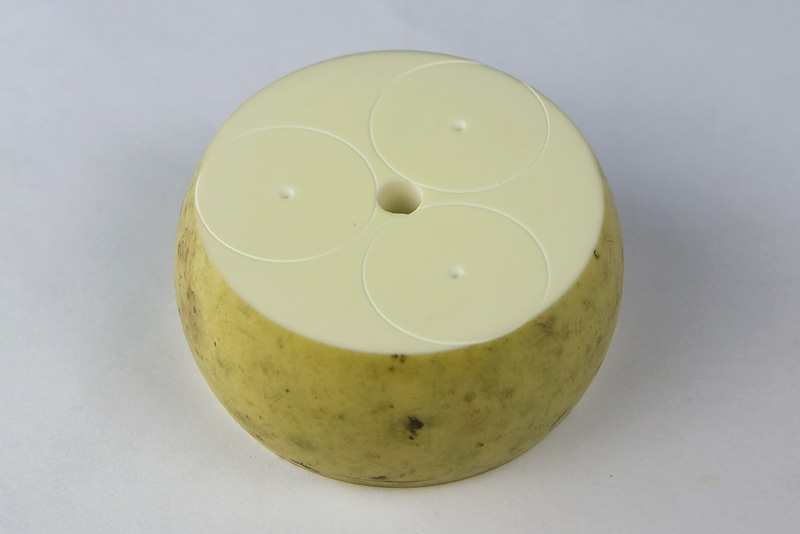
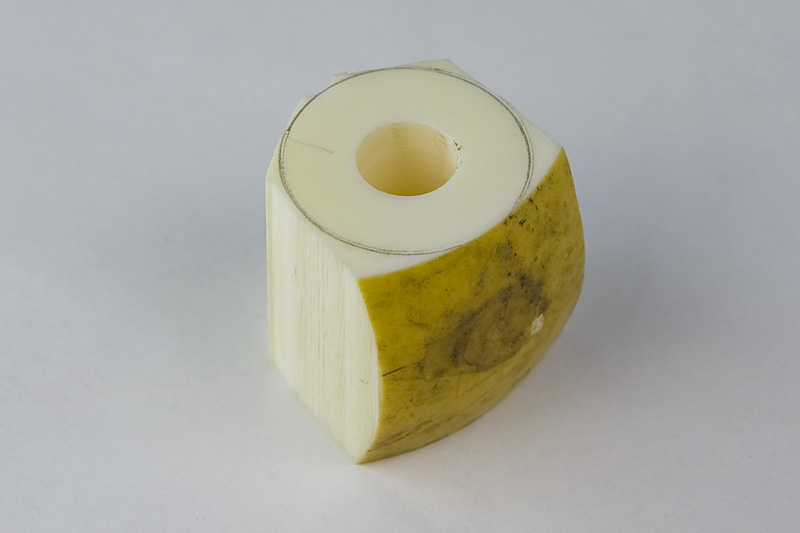
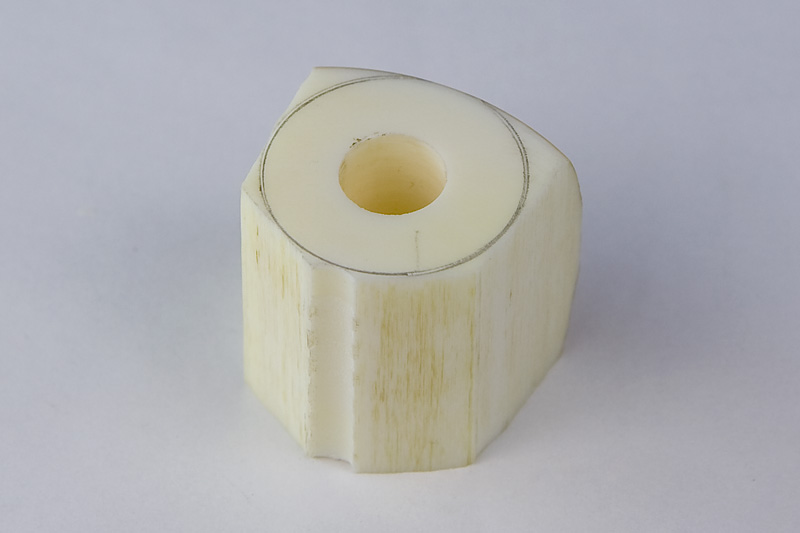
I cut the ball down to 1.060 thickness, taking half off each side. While it's in the lathe, I drill a hole in the center. This will provide a machined surface that is square to the face. In the 2nd pic, you can see my layout that will be my guide when cutting out the 3 collars on a bandsaw. The layout is for 3 joint collars, each .920 in diameter.
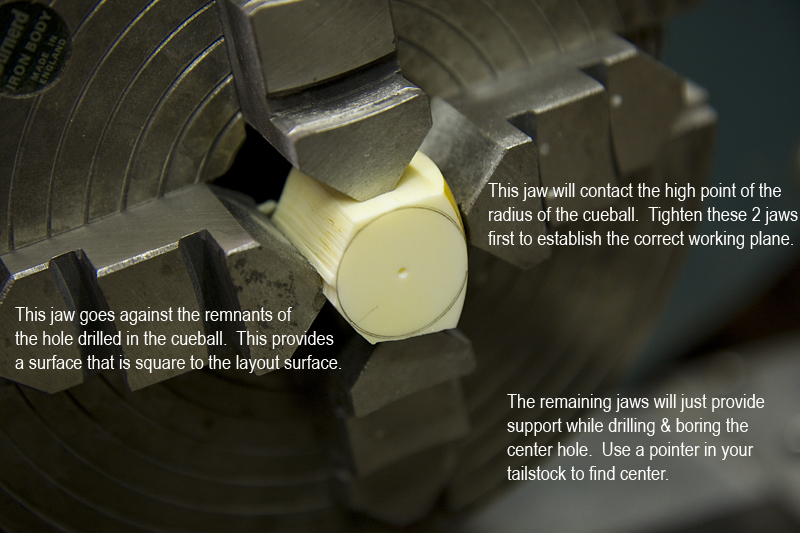
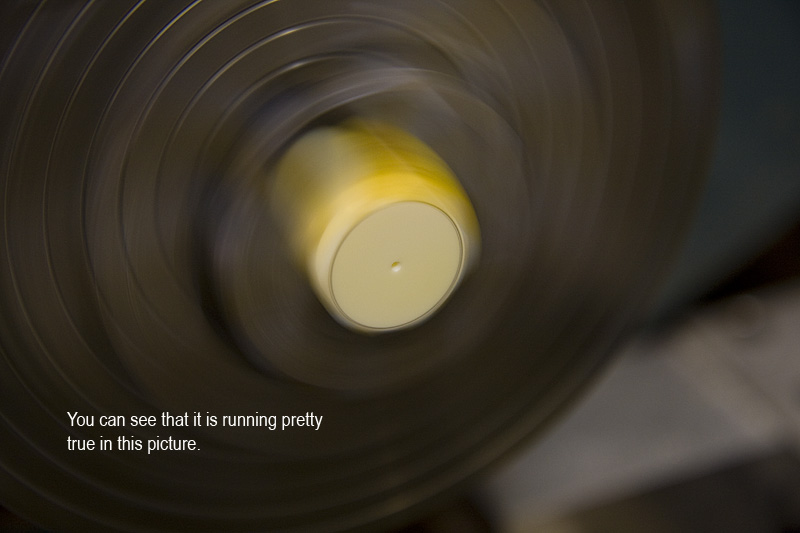
This is how I chuck up on the freshly sawn collars. The previously drilled center hole helps line up the blank perpendicular to the exposed face. It isn't perfect but it sure makes it easy to get them very close. In this particular instance, it took less than 60 seconds to find center & the face ran within .002". With the collar blank running true, drill & bore a hole to fit a 3/8 arbor. Don't worry about truing up the faces. That can all come later.
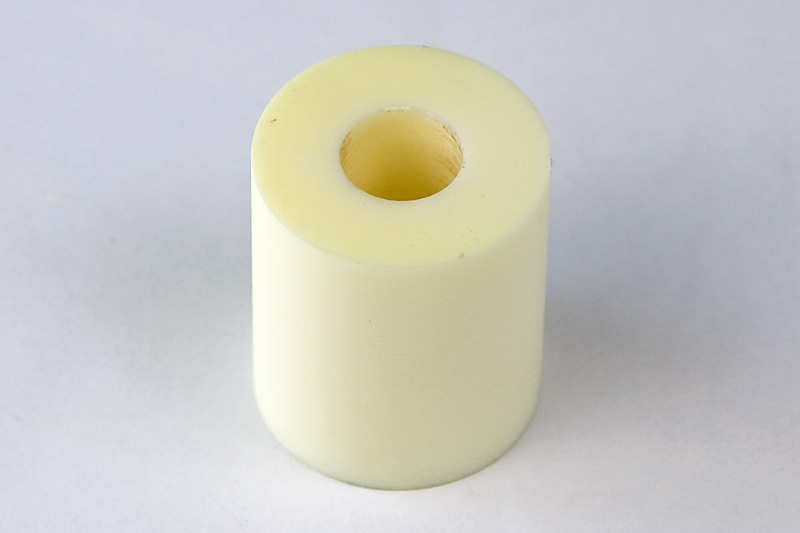
Here are both sides of the collar with the 3/8 hole. You can see the remnants of the drilled hole in the 2nd pic. Now the collar can be installed on a 3/8 arbor, allowing the OD to be turned concentric with the 3/8 hole.
And a look at the finish turned diameter.
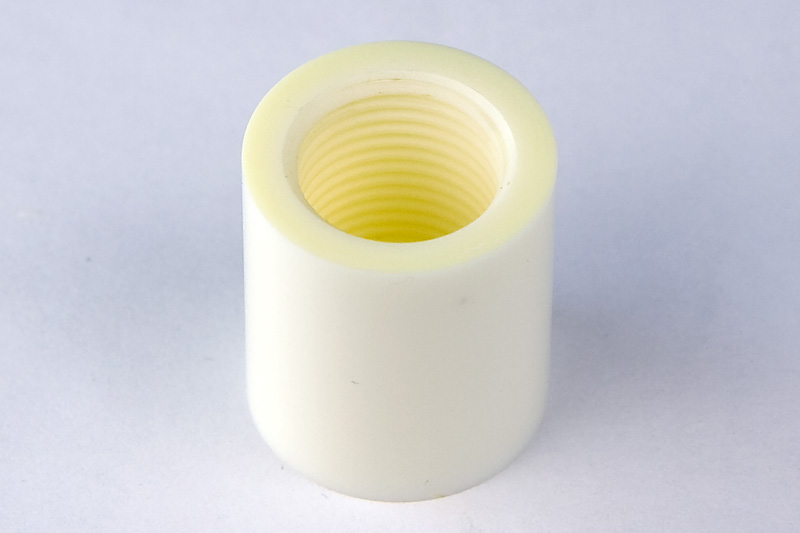
Now that the OD is done, you can drill, bore & tap the collar. Lately, I've been cutting my ferrule & joint collar threads with live tooling instead of taps because the results are so much cleaner & you can machine a full thread all the way to the shoulder. Personally, I like a .500 bore for the exposed face of the collar and 5/8-18 x 3/4" deep threads on the other end. Of course, you would face the threaded end at this time to guarantee the face is square with the threads. The other face won't need finishing until the cue is ready for a joint pin.
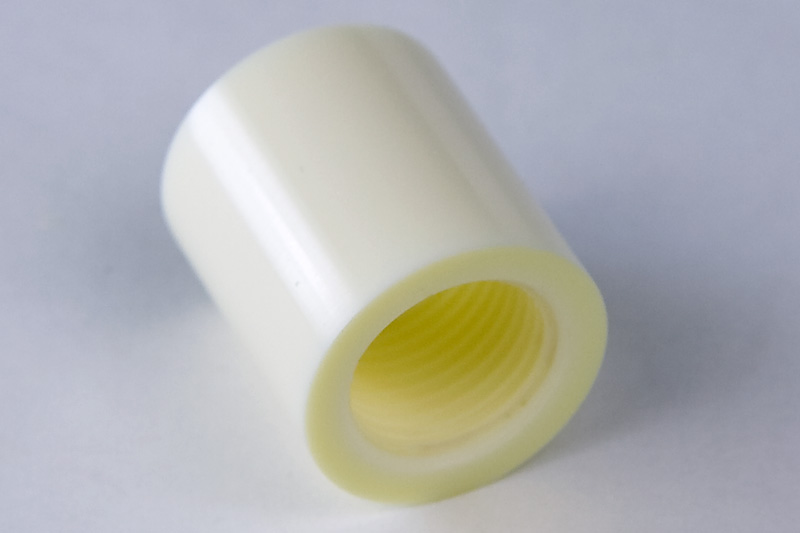
And here's the finished product.
THIS LINK will take you to another page showing the above procedure done by CNC.
---------------------------------------------
A variation is making the joint collar from a pool ball. This jump/break cue (made by another cuemaker) has a Yellow Heart forearm & the owner wanted the original joint collar changed from brown linen to a 1-ball. You can see the before and after plus a close-up of the joint faces. I was skeptical at first but it came out well.
A supplement:
A few have asked how to lay out the 3 equally spaced holes on the face of the cueball. Originally, before I had my CNC machine, I just constructed 3 equally spaced lines & experimented with different radii & blank diameters until I found a something that worked. It seems that is a lost art gone the way of the slide rule. Now, I have the luxury of CAD to simplify my job. To make it easier for you, I'm including a sketch showing the rectangular dimensions needed to lay out your cueball. It might be easier to layout a piece of paper & transfer it to the ball. All you really need to do is lay out the 3 center points on the face of the cueball, prick punch, then lay out the (3) .920 diameter holes from the punch marks. Then it's off to the band saw.

click on the sketch
Another supplement:
I have some time to kill so here's a quick lesson on how to construct a hex, which will allow you to divide a circle into 3 or 6 equally spaced segments. Start by drawing your desired radius with a compass - in this case, we'll use .590 as required above. Then pick a point - any point - in this case, Point "A" in the sketch below. Take your compass, which is still set to a .590 radius and draw an arc from point "A" that intersects your base circle. Now draw another arc using this intersection point as your base. And another. And so on. It just so happens that constructing a set of 6 arcs equal to the radius of a circle will divide that circle into 6 equal segments. Without getting too far into it, it's easily explained by the relationship between the hypotenuse & the short leg of a 30-60-90 triangle in which one is twice as long as the other. Anyway, I've effectively killed this bit of time so I'll quit now.

click on the sketch